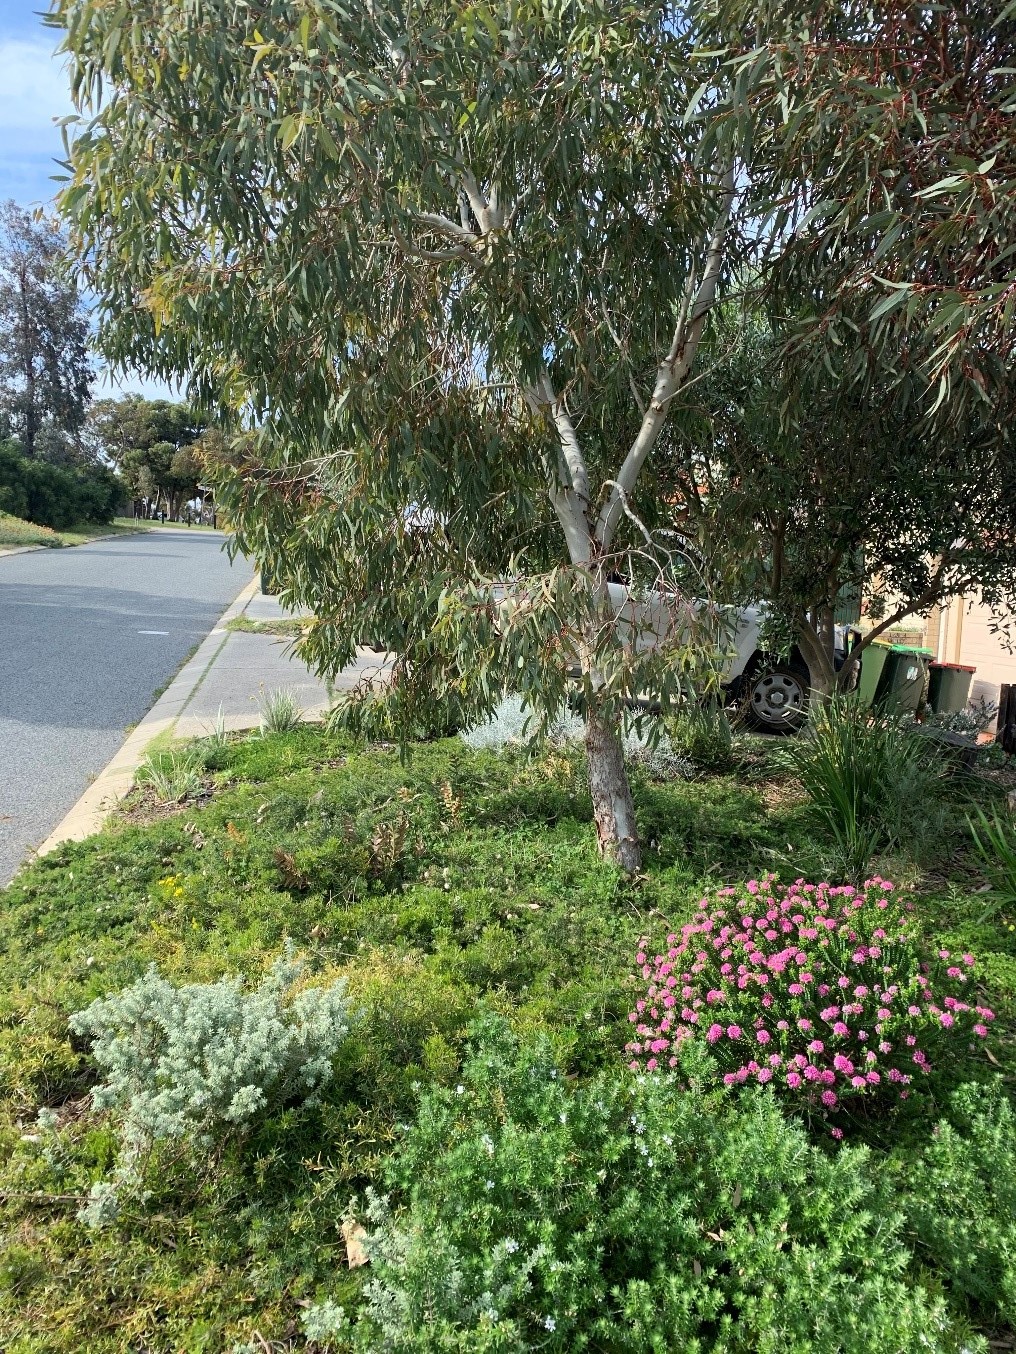
Biodiversity, local plants, less water, more trees—are all fantastic reasons to consider converting your verge over to natives, not to mention adding interest to your house and street—especially if you’ve ended up with the all too common piece of couch grass that dies off in summer and revives to a reasonably pleasant green landscape in winter, with very little maintenance needed in between. However, converting to a native verge is, as you suspected a really great thing to do for yourself and the environment and is also really low maintenance once established—we’re going to outline 7 steps to do a successful native verge conversion.

Step 1: Know your landscape and prepare early
Yes, this means get out and kick the dirt and get to know your piece of shared land. Although this land is owned by the Crown and vested in the local government agency (the Council), it’s becoming more and more accepted that as a landowner of the property, you have a shared responsibility for managing this land—and making the most of the space can be really rewarding and as is often the case, this could be the only piece of land that gets enough sunshine to grow some amazing natives on your block.
When you’re out looking at your bit of dirt, give it a light dig with a shovel and consider:
- Are there weeds to be dealt with? If so, getting some professional advice before you plant is really important. Start weed management the year before you plant (i.e. Aug– Nov). APACE have full trained and experienced staff that can help you with this. To create a native landscape (mini-ecosystem) that supports wildlife and native insects, remove as many weeds as you can beforehand to help the native plants—because weeds do compete with natives for nutrients, light and water—and are usually pretty successful at doing so. Weeds that are particularly troublesome are bulbous weeds include soursob (Oxalis) and onion weed, as well as couch grass. Before undertaking any work that may disturb the soil, consult with an expert—particularly if you have a complex weed problem with bulbous weeds. If you do seek your own expert in weeds, check they have a pest management technician licence endorsed by department of health.
- Is the soil native/local? Does the soil look fairly uniform in colour and texture, or is there a lot of building rubble or other bits and pieces in the soil? Does the soil just look like yellow builders sand? If so, you might need some soil amendment when you plant (e.g compost mixed in with the planting hole in a 1:1 ratio).
- Is it hard to dig? You may find you can’t get a shovel in very far at all—in which case the soil is likely compacted after lots of use… and will need to be ‘aerated’ by digging with an aerator or rotary hoe or shovel prior to you planting so that roots can push through the soil and get access to air/water/soil and nutrients. This helpful Gardening Australia link does explain more about soil compaction—just note that for coastal soils, our sand is easier to restore by digging than compaction than in clayey soil (more common over east, or in the hills).
- Before you do any excavation, remember to Dial Before You Dig—check there are no important and expensive services just below the surface—as can be the case in the verge (power/water/sewer/telecommunications).
- Have a look at this Verge-Schedule – this is our best recommendation on the sequence/order of events that are needed to establish a successful, low cost, biodiverse verge.
Step 2: Know your area and local Council guidelines
As we all live together in a community, we do need to consider our neighbours and safety of the people around us—which is where the local Council guidelines come in. Your local Council will have a range of guidelines about what you can and can’t do in the verge that need to be checked. Some local councils now require that a verge plan be submitted for approval prior to implementing any changes in your verge (make sure you check with the Council!).
Councils do typically require:
- A strip of land for pedestrians along the road kerb (about 1 to 1.5m in width)
- Max height of shrubs 600–750mm
- Access to all services (e.g. poles/pits)
- No tripping hazards
- No prickly/poisonous plants
Step 3: Have a think about the plants you like
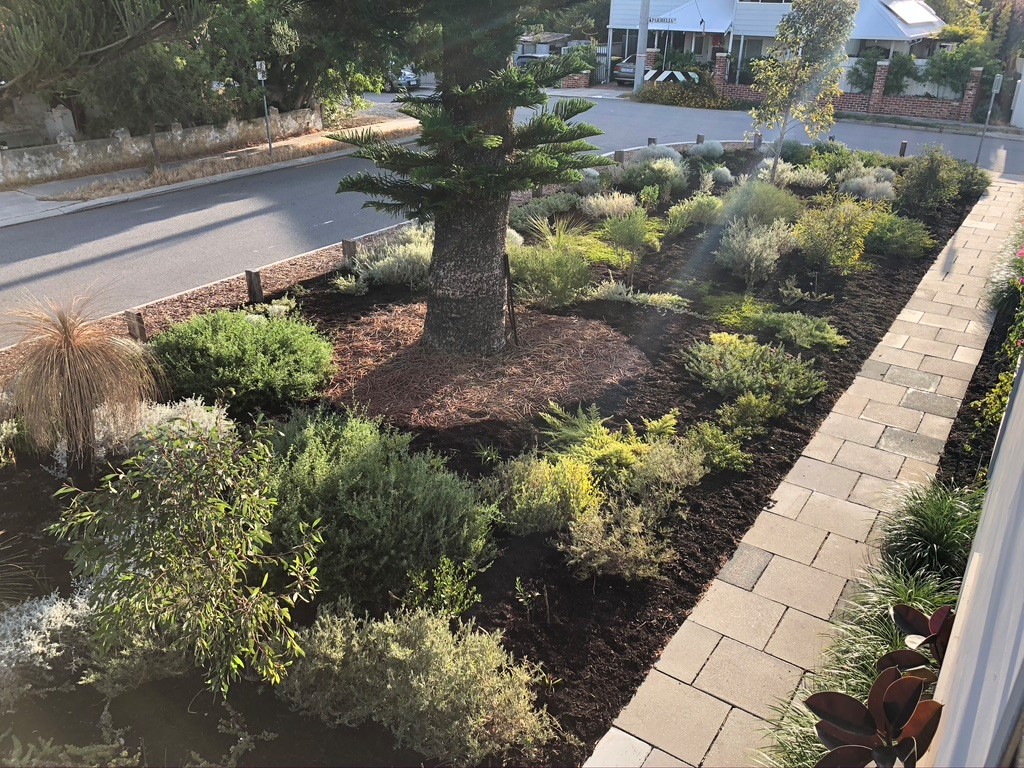
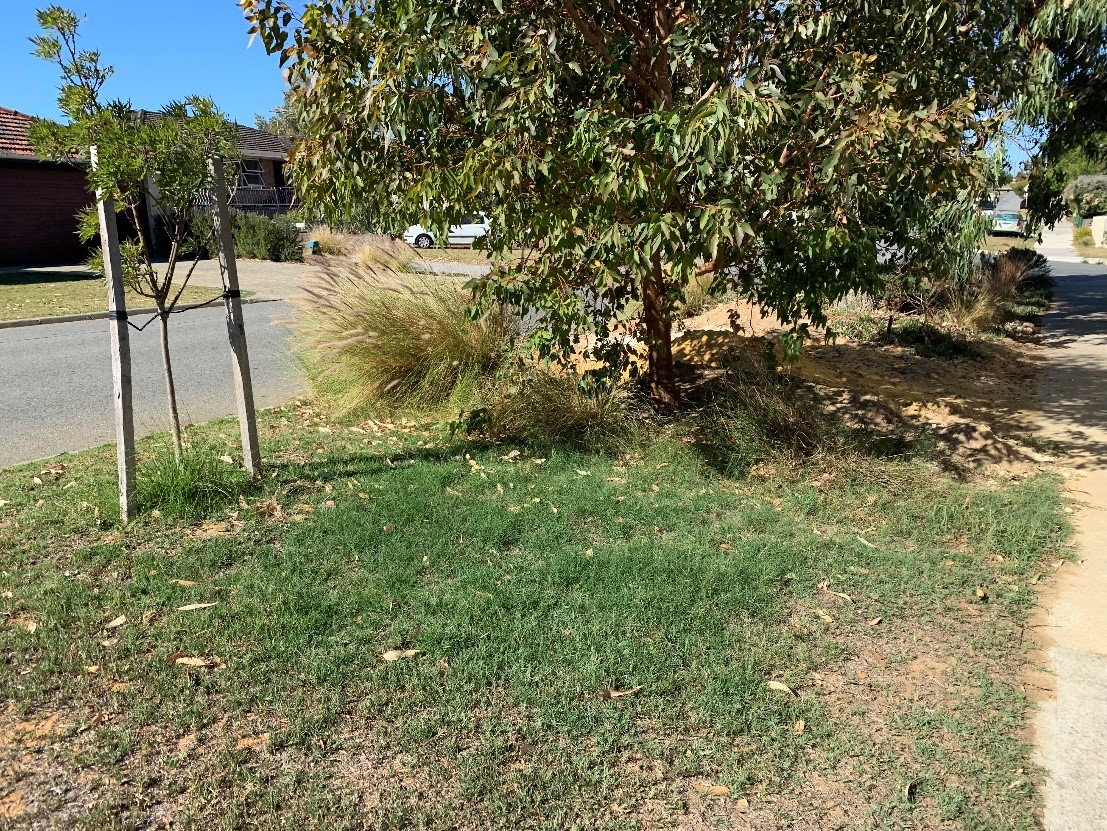
Do you already have a street tree? If not, consider planting one as trees bring a huge amount of benefits, making the street a more enjoyable, liveable environment to walk and play in, as well as improving biological diversity—and the Council may plant one for you! Refer to your local Council website for a list of tree species allowed in your area. This list is based on the aesthetics of the street as well as other practical things, like overhead powerlines or water requirements of the tree. Once you’ve decided on a tree, these are usually located central to your verge area, unless you decide to choose a few small trees instead (APACE have a great range of small trees—such as Fremantle Mallee (Eucalyptus foecunda) or the Rock Mallee (Eucalyptus petrensis).
Often it is great to have a decent size tree (even a Tuart, or similar) to really help the wildlife in your area and provide shade for the street to reduce the heat. If you’re a bit nervous about putting in a large tree, come into APACE and have a chat with the friendly staff who will be able to recommend a species suitable for your verge.

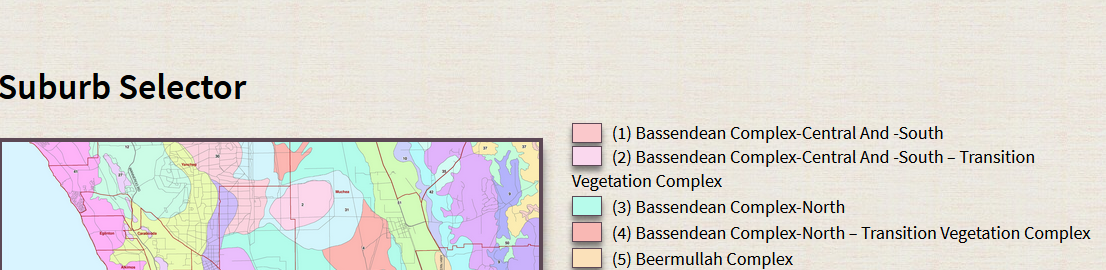
And finally the plants! APACE specialise in local native plants for your area. Find out what area you’re in by looking at the APACE suburb selector tool on the website and this will give you a list of local native plants for your area. You can also contact APACE for a list of plants that are suitable to verges in your area and can also do a site visit to discuss.
You can also search the online nursery and check the availability list on the APACE website. The best time of year to plant is April/May and usually there is a massive range at APACE at this time of year. Make sure you get your order in early – by February for May planting (3 months prior is recommended).
Step 4: Sequence of Events—Early Preparation!
So far, you’ve done some investigating and research, but now you need to start. This is the recommended timing:
- Start weed management the year before you plant (i.e. Jul–Dec).
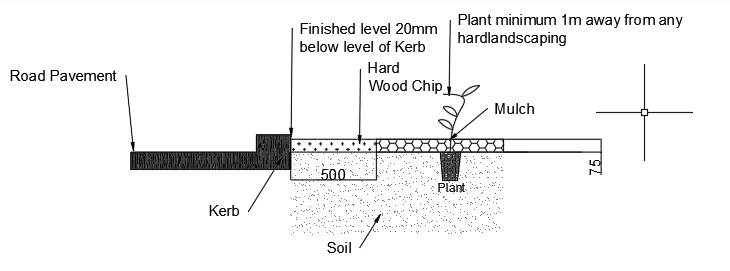
- Engage a Contractor to scrape back topsoil so you have room for mulch (i.e. 50–75mm below any adjacent hard structures such as kerbs). Note—if you have bulbous weeds, you’ll need to consult with an expert on weed removal before disturbing them—to avoid spreading them throughout your garden! Contact apace@apacewa.org.au to get some advice specific to your site.
- Water in Perth is a scarce resource—and we can avoid reticulation by planting at the right time of year in the autumn/winter. You only need to handwater ~1.5L/plant twice per week for the first two summers and afterwards you will not require the retic—which can be in the order of $1,000 to install. If you keen on retic, an individual dripper system to each plant is the best option as it directs water directly to the stem of the plant (rather than grid-based dripper system). You can contact your local waterwise specialist via the Water Corporation website.
- Bring in a good quality mulch that meets Australian Standards AS4454 waterwise mulch and place it at a thickness of 50mm. Do not put down any cardboard or plastic—it stifles the life out of the soil by making it hot and difficult for water to penetrate the soil. You can also ‘cut and drop’ any prunings to use as mulch as well, once your garden is established.
- Leave the mulch bed ready for planting, watering occasionally to keep it neat and tidy – its ok to plant any time in winter, we just suggest April/May is the earliest to plant (and its better to wait til the soil is a bit wetted up after rain, so best timing can change depending on the year we’re having).
- Then you can select the plants and put in an order so you’re ready to plant.
Step 5: Plant your Plants
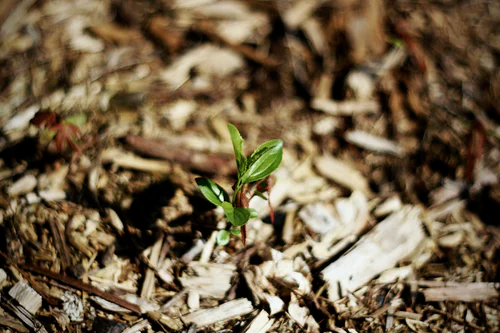
If you’re planting a tree—do this first. Then plant the smaller tubestock—some tips for planting tubestock include:
- Create a planting hole that is twice as big as the pot.
- Water plant well the night before planting.
- Tap the top rim of the pot with a spade or on an edge, then turn the pot upside down – the pot should come straight off.
- Place the plant in the hole so that the top of the plant ~2cm below the surrounding soil, so there is a bowl effect for trapping and directing water to the plant.
- You can choose to add a slow release native fertiliser (low phosphorus)—e.g. APACE fertiliser tablet, or similar product and add to the planting hole to give plants a boost for the first year, however if your soil is native/good quality (holding water/nutrients), you can do without fertiliser – best practice is to minimise fertiliser additives to reduce the impact on the natural waterways/Swan River.
- Backfill with soil mix (See note below on Soil Mix) and press firmly around the plant so there are no air gaps.
- Water in well, taking care not to disturb the soil around the plant.
- Mulch around the plant (keeping clear of the stem by 5cm or so).
- Note: if planting into a hillside, it is good to mound soil to create a small basin to collect any runoff and allow watering to infiltrate the soil (see below)
- See this video on Youtube for a 5 minute explanation on planting tubestock: Tubestock Planting Video

Soil Mix
Mix 1 part compost with 1 part of existing soil mix in planting hole. If replacing soil (e.g if soil has been brought in or is spoil), use a soil mix suitable for natives in garden beds (low phosphorus). Check to see your soil mixes and conditioners meet Australian standards to avoid importing weeds or other diseases.
Step 6: Water and maintain:
All gardens do need some maintenance—even native plants. For native gardens that are not on retic—make sure you deep water (1.5L/plant) twice per week in summer—and if there is a heat wave, give the plants an extra water to get them through. Prune natives regularly 3–4 times/year—but just a tip prune (less than one_third of the branch) and mostly keep the secateurs to the green growth (rather than any woody stems, which will not grow back as well). Prune small plants regularly so they develop in a form you like. Finally, a dose of a native fertiliser (use a slow release, low phosphorus fertiliser) 1–2 times per year in Autumn or Spring—there is no need to apply excessive amounts of sheep manure or other manures as natives are adapted to low nutrient conditions and this may well finish them off!
Review your verge planting the year after in March/April to check on whether there is a need for some weed management (particularly if Couch grass has popped back up) – as this will prevent it reestablishing in long term. You can also see which plants have done well, infill any areas and add some more sensitive plants for biodiversity in the second year once plants are established.
Step 7: Watch, grow and tweak as you need to
This follows the permaculture philosophy of ‘Small Slow Solutions’—and what we do next is we watch, observe and see which plants do well, how the environment changes as trees grow and we can adjust and maintain the verge over time. Over time, you may need to replace some plants that are now in a shady spot under a tree instead of in the open sunshine (with a plant that likes shade), or infill some gaps where a plant hasn’t ‘thrived’. Remember that as with all things, growing native plants is a learning experience and the first planting of a verge is like putting in the ‘bones’ and it then becomes fun filling in the gaps with some everlastings, or other favourite plants as time goes on. Note that you may find it helpful to have some areas without mulch cover as would occur in a natural system to allow plants such as everlastings to grow well or native seeds to re-establish.
Enjoy and if you have any questions, feel free to ring the team at APACE or visit the nursery 8AM–3PM on weekdays. You can also look through the information and we have provided some helpful links and documents on the APACE plant advice page here.
Written by Michelle Donnelly, Landscape Designer/Environmental Engineer
For more information, contact APACE WA
